

Blog

How to Build a DIY Wind Turbine?

A Diy Wind Turbine can look simple on paper: blades turn a rotor, and a generator produces electricity. In practice, the result depends on wind speed, tower height, blade design, and careful electrical matching. The U.S. Department of Energy’s 2023 Distributed Wind Market Report documents more than a decade of real-world small and distributed wind installations. Its findings offer a useful reminder: site conditions matter as much as equipment. A breezy afternoon is not proof of a strong, steady wind resource.

The U.S. Energy Information Administration reports that an average residential customer used about 10,791 kilowatt-hours of electricity in 2022. That figure helps set expectations. A small homemade turbine may support modest loads, but it should not be assumed to power an entire home. Measure local wind conditions, choose a clear and suitably exposed site, and plan for a secure tower, weatherproof wiring, and safe maintenance access. These are not decorative details. They shape both performance and risk.

This guide explains the main components, planning choices, and basic assembly steps behind a DIY project. It also points out where estimates can fail. A rotor that spins impressively in a gust may still produce little useful energy over a month. That part is easy to underestimate. Use established engineering guidance, verify component ratings, and have electrical work reviewed by a qualified professional. A practical build starts with honest expectations—not just a spinning set of blades.
How to Build a DIY Wind Turbine?

Assess Wind Conditions and Choose a Turbine Design

Assess Wind Conditions and Choose a Turbine Design

Before building, check whether your site has useful, steady wind—not just dramatic gusts. The Global Wind Atlas, developed by DTU and the World Bank’s energy program, offers modeled wind-speed and power-density maps for initial screening. Maps are a screen. Local hills, trees, and nearby buildings can change the flow sharply. The U.S. Department of Energy’s Small Wind Guidebook recommends placing a turbine tower at least 30 feet above obstacles within 300 feet. Treat that as a planning guideline, not a substitute for site-specific checks. For a stronger estimate, record wind speed and direction near the intended hub height over time; a short measurement may miss seasonal changes.

Choose the design around the wind you actually observe. A horizontal-axis rotor can suit an open site with consistent prevailing winds, while a vertical-axis layout may fit some locations with shifting wind direction. Neither design can overcome severe turbulence. Match rotor size and generator output to the measured wind range, expected electrical load, and storage or grid setup. A spreadsheet can make a weak site look convincing. It cannot fix poor data.

Tips: Keep a simple wind log, note gusts and prevailing direction, and compare readings at different heights. Check tower clearance and vibration risks before fabrication. Small details matter. If measurements are uncertain, pause before choosing blades; that decision is hard to undo.

Gather Materials and Prepare the Tools

How to Build a DIY Wind Turbine?

Gather Materials and Prepare the Tools

Before building, choose a small, low-voltage turbine for learning or outdoor experiments. Gather a compact generator, suitable blades, a sturdy hub, a tail vane, and a strong mounting pole. Check that the generator and blades are compatible; mismatched parts may produce disappointing results. You will also need wire, insulated connectors, fasteners, and a weather-resistant enclosure. Keep a ruler and marker nearby. Small details matter.

Prepare safety glasses, clamps, a hand drill, basic cutting tools, and a multimeter. A soldering iron may help secure electrical connections, but use it in a ventilated area. Clamp each workpiece before drilling or cutting, and inspect blades for cracks or rough edges. Balance the finished rotor carefully; even slight differences can cause vibration. This plan is not perfect for every design, so check component instructions before assembly.

Build the Rotor and Connect the Generator

A small rotor begins with matched blades, not guesswork. Cut each blade to the same length and shape, then weigh them. Even a slight difference can cause vibration. A kitchen scale helps, though it is not a precision instrument. Check the hub for cracks and use bolts suited to the material. Tighten them evenly. Leave no sharp edges exposed.

Balance the finished rotor before connecting it to the generator. Support the hub on a smooth shaft and watch which blade settles downward; add small corrections near the lighter side. It can take several tries. Mine never looked perfectly still, which made me question whether the support was level. A simple test is not proof of safe operation, so inspect the assembly again.

Align the rotor shaft with the generator shaft, using a flexible coupling when appropriate. Misalignment can wear bearings or shake the frame. Turn the rotor by hand and listen for rubbing. Then test at low speed in a clear area, with people kept away from the blades. Use a multimeter to check output, and include suitable electrical protection in the circuit. Stop if the frame moves, the coupling slips, or vibration grows. Wind is less predictable than a hand test.

Assemble the Tower and Electrical Components

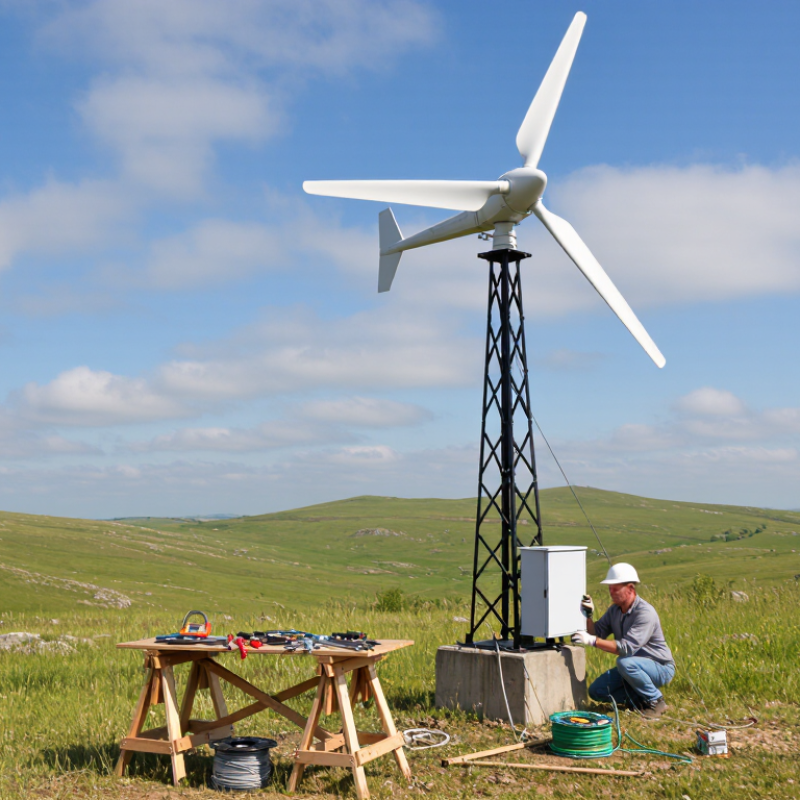
Set the tower base on a firm foundation specified for the soil and turbine load. Check that the mast is plumb before tightening its supports. Guy wires should be evenly tensioned and clear of walkways. Assemble the tower on the ground when practical, with the rotor secured or removed. Raise it only in calm weather, using suitable lifting equipment and a capable crew. Keep people outside the fall zone. Small errors matter. I used to think a slightly crooked mast was harmless; it can add vibration and stress over time.

Mount the generator securely, then route its cables through the tower without pinching or sharp bends. Choose cable thickness for the expected current and run length; undersized wire can heat up and waste power. Fit the system’s required disconnects and overcurrent protection, and connect grounding and surge protection according to the equipment instructions and local electrical requirements. Keep battery terminals covered, observe polarity, and use components rated to work together. Keep it dry. Before energizing anything, inspect every connection and test for shorts with the system isolated. This step can feel slow, and I still find it easy to miss one loose terminal. Have a qualified electrician review the wiring, especially where it connects to a building or the grid.

Test the Turbine and Adjust Its Output

After assembly, test the turbine outdoors in a clear, open area with its base firmly secured. Keep people away from the rotor, and stop testing if the tower shifts, blades wobble, or wind becomes gusty. A brief check matters. Loose connections can make readings misleading.

Measure voltage and current while the turbine powers a suitable load; open-circuit voltage alone does not show useful output. Record wind conditions, rotor speed if available, voltage, and current at regular intervals. Estimate electrical power by multiplying volts by amps. Repeat the test under similar wind conditions, since changing gusts can distort comparisons. Small changes count.

If output is low, change only one factor at a time, such as blade angle or the electrical load. Then test again. A modest adjustment may improve performance, while an overly heavy load can slow the rotor. Watch for vibration and heat, too. Those signs deserve attention, even when the meter looks fine. One limitation is hard to avoid: backyard wind is inconsistent, so a single reading proves little. Keep a simple log, and treat unexpected results as a reason to inspect the setup, not force it to spin faster.

Tell us about your project

Our Off-grid experts will come back with recommendations

x
Can we help?
Leading Edge
Off-Grid Power Requirements
Leading Edge
Sign Up To Receive Our Newsletter

Stay up to date with Leading Edge innovations and offers by joining our mailing list. Occassionally we send informative newsletters, offers and promotions that we think you'll find useful or interesting.